Portfolio Design #02: User Interface & Experience (Frontend)
Introduction
Now that we’ve gone through the entryway of this website, we’ll look at the brittleness beauty that is the user interface.
SPA vs SSR
When building this, I was faced between two options: full-steam on a single-page application (SPA) or go with a server-side rendering (SSR) approach which could help with SEO and client-side performance.
I decided to go with a primarily-SSR/SSG approach with React Islands for some functionality.

The fundamental difference: SPAs render on the client, Islands render on the server and enhance on the client.
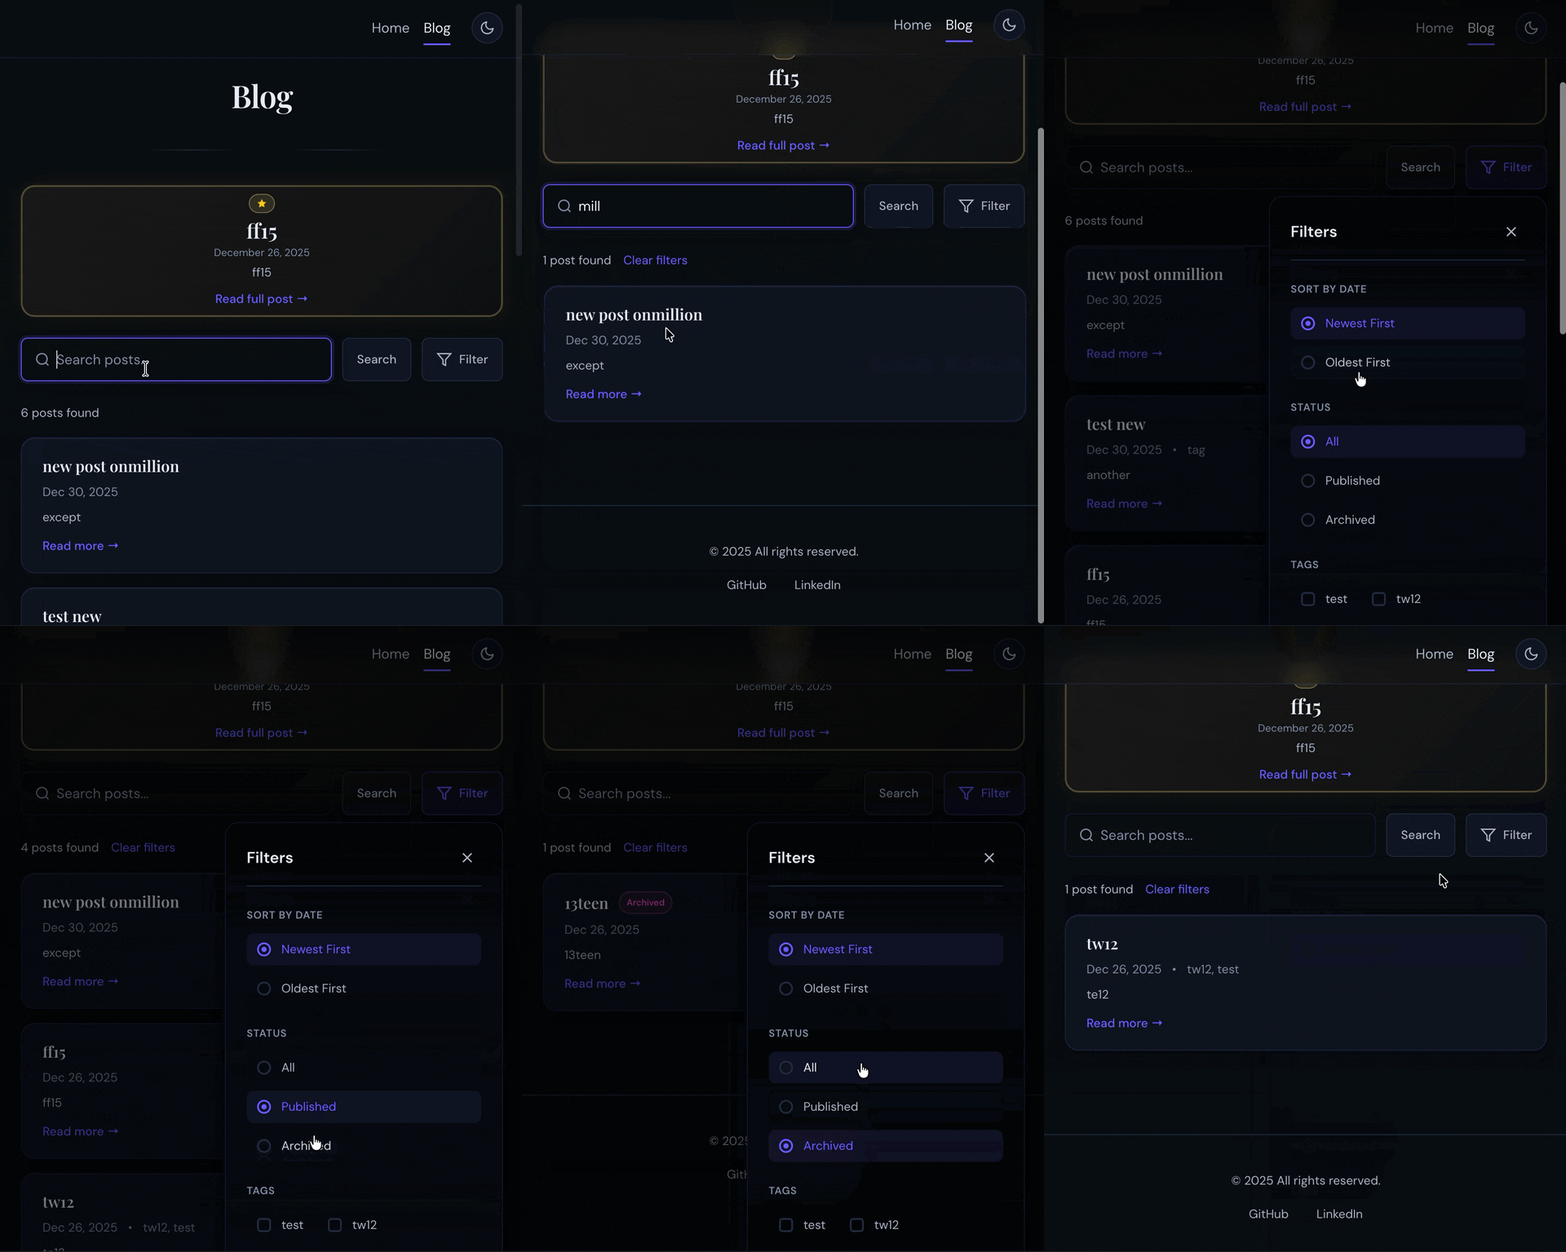
For a portfolio & blog, server-side rendered content made most sense. I want my posts delivered as complete and fast as possible to my 1 DAU. There is no heavy scripting necessary for most of my pages, as they are content-heavy. The blog listing page would need search and filtering, and here is where the React Island hydrated was much easier than to write-up a DOM-managing nightmare. But blog posts, which are the most important pages for end-users, are purely HTML.
With blog posts being written in Markdown requiring HTML processing, it’s lighter on the client for the server to handle Markdown -> HTML rendering and passing it post-processed. By using SSR, I was also able to easily implement caching mechanics, which I’ll go into a post or two from now.
HTML Rendering & Generation
If you noticed in the earlier diagram from post #01, there is no separate API and UI service: it’s all one. While this would certainly be fickle for a larger project where I may want to scale the server without the UI, with my throughput, this should never be a worry.
For generation, I use templ with Go. With templ, I’m able to create pseudo-Go/HTML pages that build into the valid HTML that gets served. This generated content is wrapped in a templ.Component that a request’s handler can render onto the writer to pass on the HTML to the user.
Blog Listing
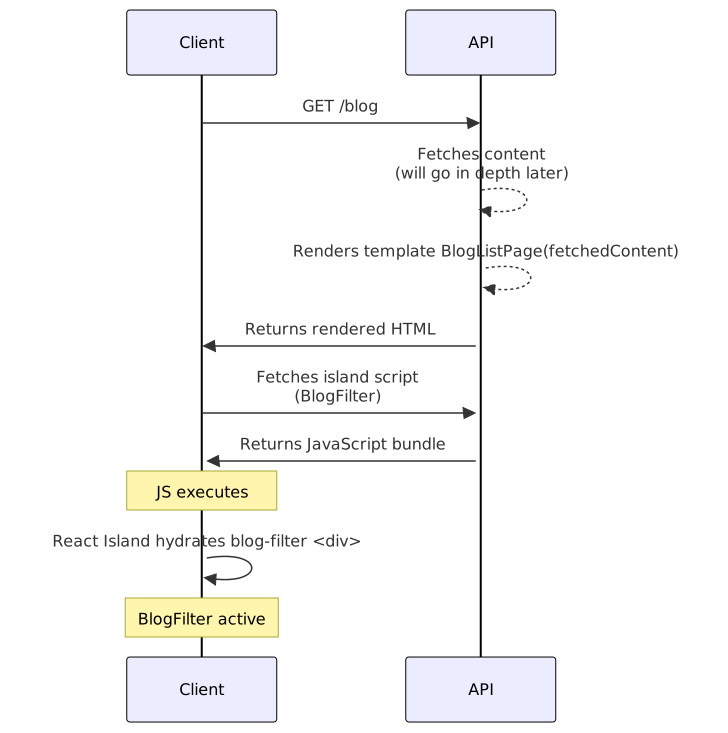
In short: The initial page load is pure HTML. If JavaScript fails or is disabled, you will still see content. The island enhances the experience, but isn’t a blocker.
This templating approach also made it incredibly easy to write custom middleware, such as generating CSRF tokens and passing it directly to the templates for use. I was also able to create CSP Policies depending on the route a user is taking.
// ui/src/islands/blog.ts
document.addEventListener("DOMContentLoaded", () => {
  const blogFilterRoot = document.getElementById("blog-filter-island");
  if (blogFilterRoot) {
    ReactDOM.createRoot(blogFilterRoot).render(
      React.createElement(BlogFilter)
    );
  }
});
The BlogFilter component handles all the interactive logic: filter state management, Intersection Observer + API calls for ifinite-scroll, and URL synchronization. It’s a self-contained island that doesn’t need to know about the page’s content.
Blog Slug Page
Individual blog posts are even simpler: pure server-side rendering. Markdown content from the database gets converted to HTML on the server, syntax highlighting and Mermaid diagrams are pre-rendered. No JavaScript required. This rendered content is then passed onto the users so they can get really quick post content.
The page loads fast, works everywhere, and search engines see the full content immediately.
Note About Mermaid Diagrams
If you’ve used mermaid before, you’ll notice I have mermaid diagrams attached. If you haven’t used it before, you should try it! Anyhow, another thing you will notice is that the diagrams are images, and not rendered content. While that is supported with mermaid code blocks, there is a sort of annoying quirk which is that they must render in an iframe.
Due to my strict CSPs (only allowing self-served scripts, and hashed scripts), I wasn’t able to render within the page without breaking the policy in place. And, from what I saw, there wasn’t a go + mermaid + HTML renderer, meaning this wasn’t something I could handle server-side.
A neat way to circumvent this CSP issue this is by doing the following:
1. Create a handler (served page) specifically for these renders. This takes in the relevant code to render through params.
2. Use a lax CSP for this new handler.
3. When rendering mermaid diagrams, use a separate iframe container that requests these laxed paged.
Note: While iframes do help with the CSP issue, each iframe fetches the mermaid script (~2 MB) and this could get slow with multi-diagram posts. While browsers cache scripts, I wasn’t 100% of iframes caching usage. To avoid bogging down initial posts with rendered diagrams, I pre-exported them as images.
The Happy Admin’s Happy Path
The same design choices above went for the admin pages as well, so there isn’t too much more to dig into architecturally. This was just something that I’m really happy about so I’m showing a few admin processes and GIFs.
As I stated in my initial requirements, an admin portal was a major part of why I was rewriting my portfolio & blog. With the new admin page, I’m able to update my main portfolio’s content, CRUD blog posts, as well as view analytics. It’s backed by a login, which means I can access it from anywhere at any times and look into how things are going.
Admin Creation & Login
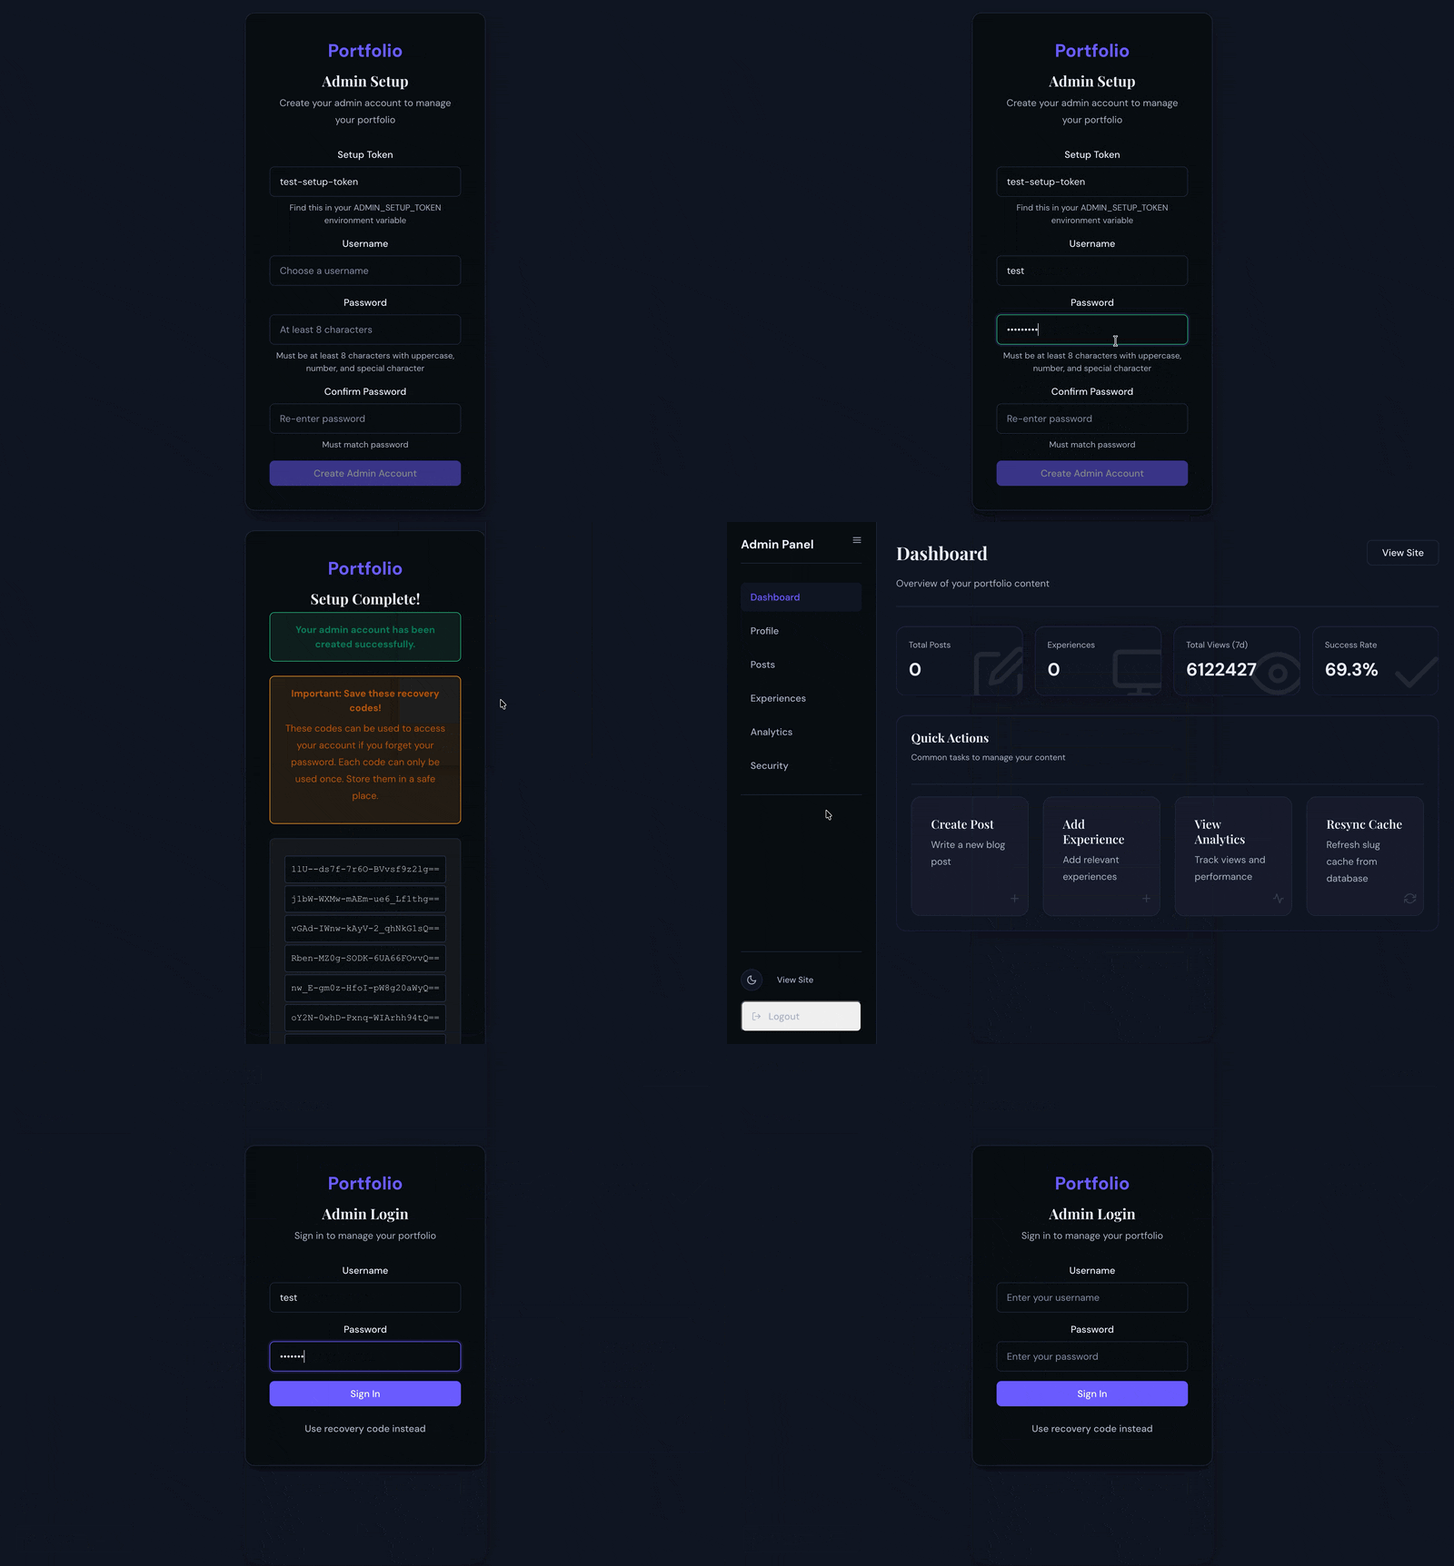
The admin creation and login process is simple and secure. When deploying the Docker Compose, you can set the following environment variables:
ADMIN_SETUP_TOKEN: One-time use token for initial creation phase. Avoids anyone else “claiming” the admin account.SESSION_SECRET: Used for the cookie storage session to ensure encryption and validation passes.
Content Management
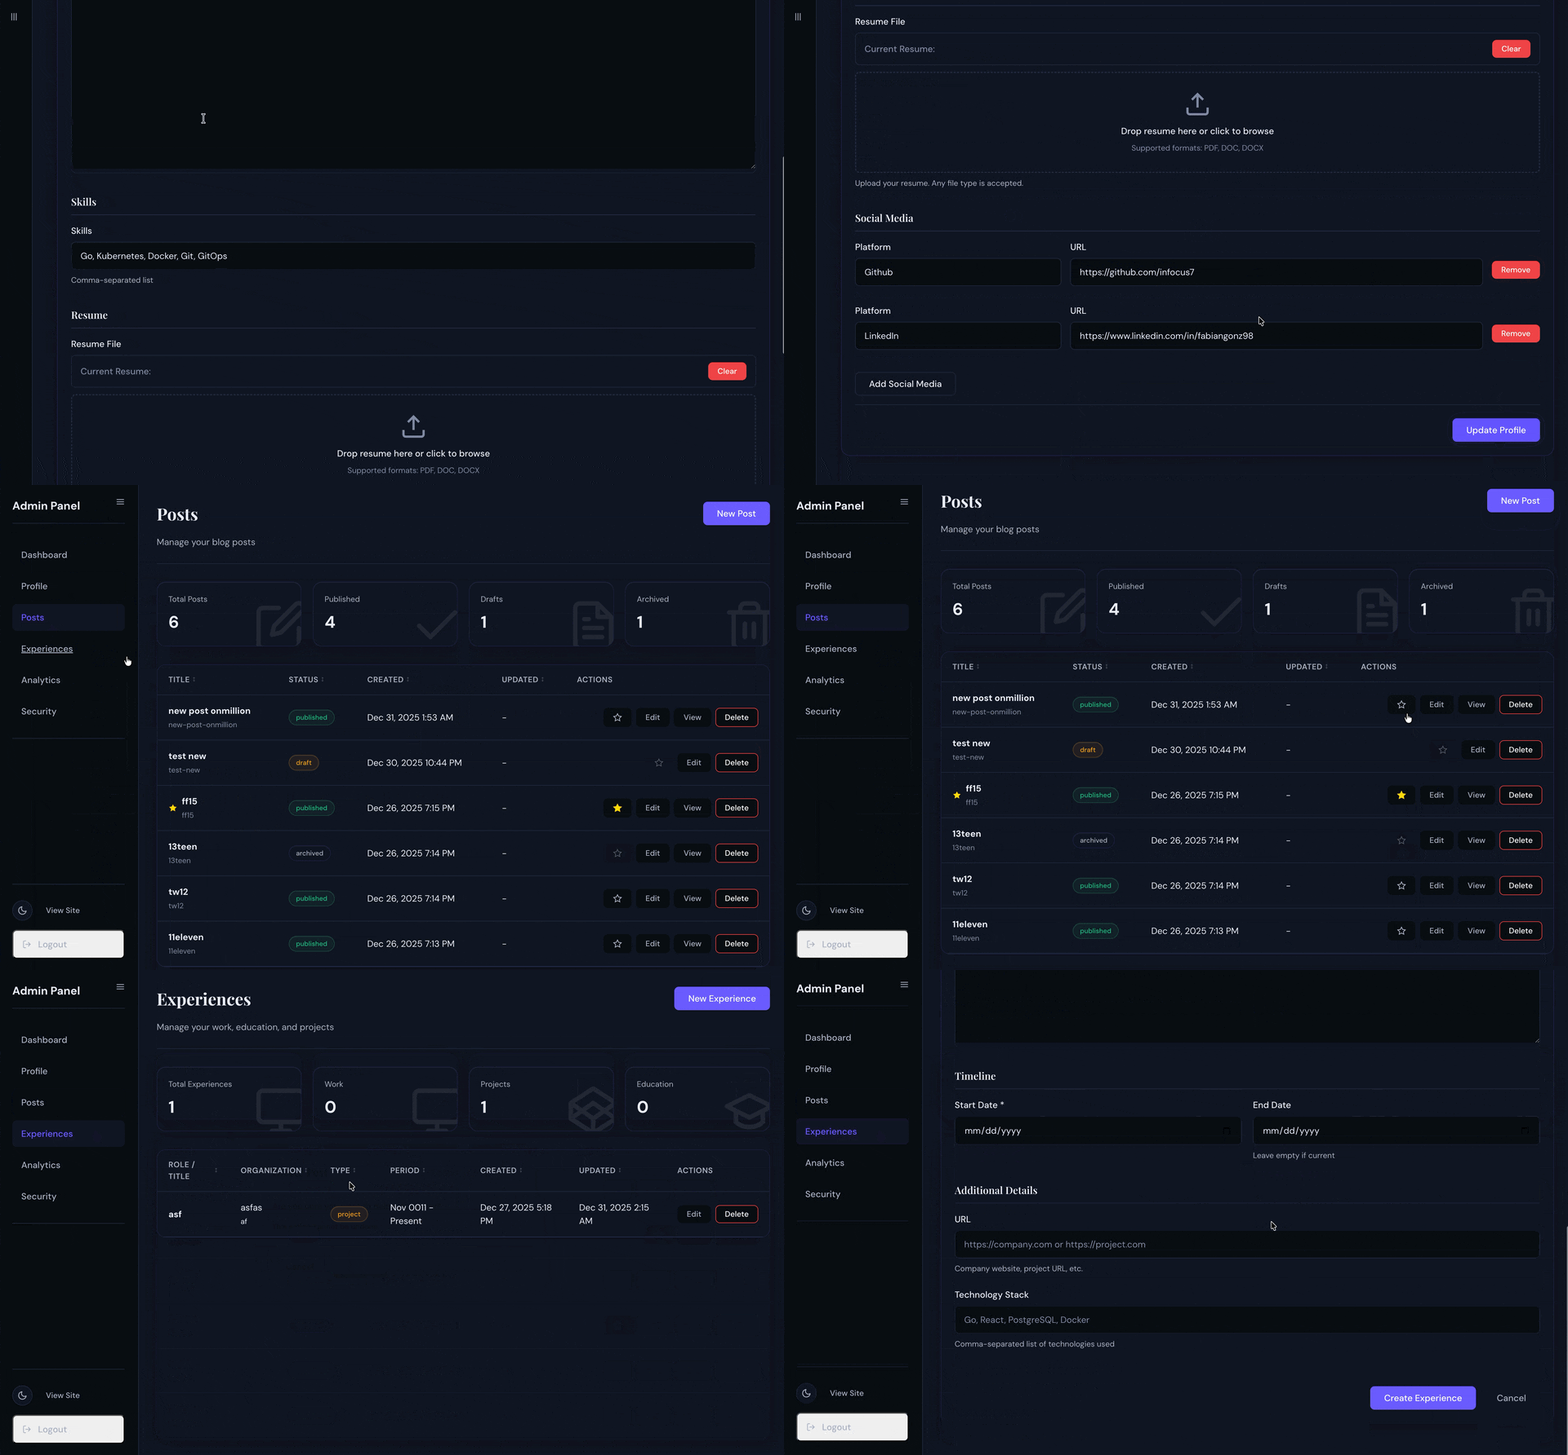
An admin has the ability to manage both the content within the homepage (personal information and well as experience,) as well as blog posts with media attached.
Analytics
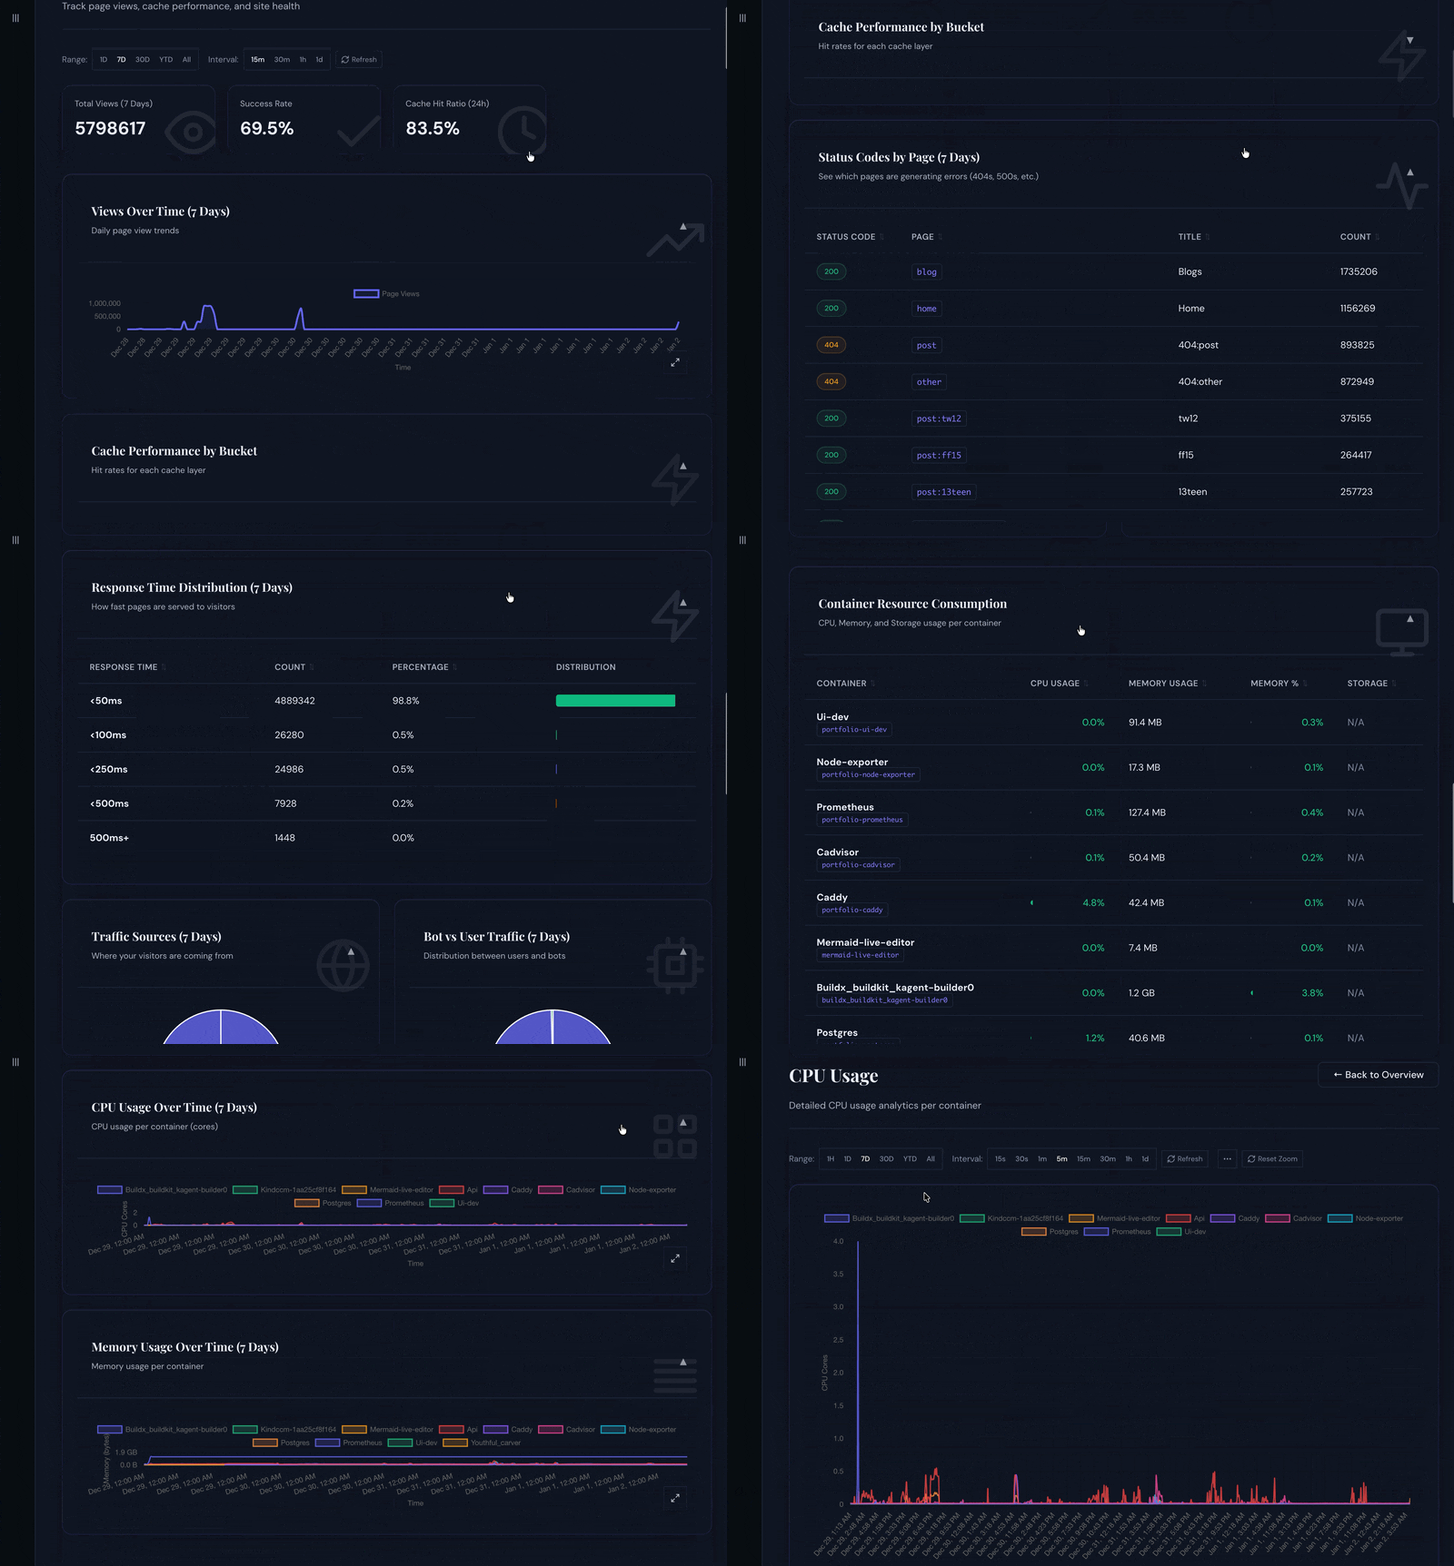
The admin is also able to view analytics about their content plus about the running containers to ensure they can easily see if the system is strained.
To Be Continued…
In follow-up posts, I’ll go through the APIs, database & caching, as well as analytics.